I’m Kabiru Sadiq, a Nigerian financial expert with more than 30 years of experience in investment strategy, capital markets, public sector advisory, and emerging markets. In this article, I explain EMA meaning in trading as a practical technical indicator that helps a trader interpret price behaviour, market trend direction, and momentum with greater sensitivity to recent data.
The exponential moving average, or EMA, is a form of moving average used to assess whether an asset is in a bullish or bearish trend over a defined period. In technical analysis, it is designed to track changes in price more responsively than a simple average, which makes it useful when a trader wants clearer information about possible near-term direction.
Like other moving average tools, the EMA helps smooth a chart so that short-term noise does not completely obscure the broader market trend. I have analyzed its use across stock, commodity, cryptocurrency, bond, and foreign exchange market instruments, and it remains one of the most widely applied tools for identifying shifts in price structure. It is often paired with MACD, Stochastic, and other indicators to strengthen a trading strategy rather than serve as a standalone signal.
EMA in Trading
In my experience, the main advantage of the EMA in trading is its emphasis on recent price action. Because more weight is assigned to the latest data and less to older observations, the indicator reacts faster when the market changes direction. That responsiveness can be particularly valuable in day trading, where timing and momentum often determine the quality of a trade.
This feature gives the EMA a practical edge over slower averages when markets are moving quickly. A trader can use it to assess whether current price movement is strengthening, weakening, or beginning to reverse. Rather than relying equally on all historical observations, the EMA places greater relevance on what is happening now, which is often critical when volatility in finance rises sharply.
I often advise market participants to use the EMA when they want to identify recent swings, trend continuation, or possible turning points on a chart. In fast-moving environments, including a currency pair such as the US dollar against the Japanese yen, or highly reactive cryptocurrency markets, the reduced lag can improve interpretation. Even so, execution still requires judgment, especially where risk increases because of abrupt sentiment changes.
EMA is a lagging indicator because it is built from historical price data, so I treat it as a guide to trend and momentum, not as a predictive signal on its own.
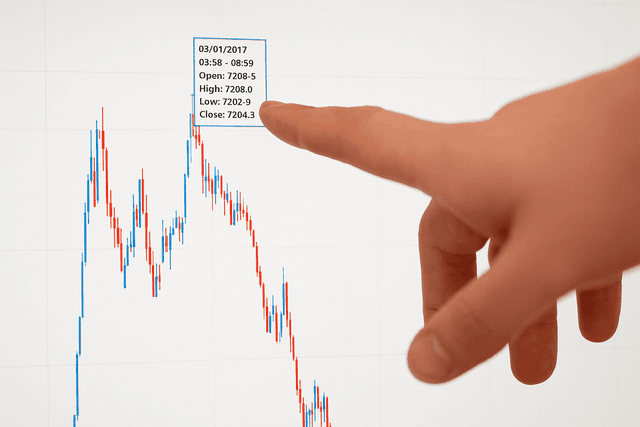
Exponential Moving Average Example
What Is the Difference Between Simple and Exponential Moving Averages?
The key distinction between the simple moving average and the exponential moving average lies in weighting. The simple version calculates an average price over a set number of periods and treats each observation equally. By contrast, the EMA gives more weight to recent price data, which allows it to reflect changing conditions more quickly.
| Feature | Simple Moving Average (SMA) | Exponential Moving Average (EMA) |
|---|---|---|
| Weighting | Gives equal weight to all periods | Gives more weight to recent prices |
| Responsiveness | Slower to react to new price moves | Faster to react to changing market conditions |
| Typical Use | Often used for smoother, broader trend analysis | Often used for shorter-term trend and momentum analysis |
| Sensitivity to Noise | Usually less sensitive | Usually more sensitive |
That difference explains why many traders prefer the EMA for shorter-term decisions. It is generally more responsive and can reveal changes in momentum earlier than the SMA. However, I have seen many investors misuse this advantage by assuming speed automatically means accuracy. A faster response may also increase sensitivity to noise, so the EMA should be assessed together with other technical indicator signals, market context, and valuation in finance where relevant.
How to Calculate the EMA
To calculate the EMA properly, the first step is to establish an initial value using the simple moving average. This starting point provides the base from which the exponential calculation can continue over subsequent periods.
To find the SMA, add together the past data points for the selected period, which are commonly closing prices, and divide the total by the number of periods. For example, if one is calculating a 50-day average for a stock, the closing price for each of the previous 50 sessions is summed and then divided by 50.
The second step is to determine the weighting multiplier, sometimes called the smoothing constant. This is calculated by dividing 2 by the number of time periods plus 1. The result determines the percentage influence of the latest price on the updated EMA reading.
The third step is to calculate each new EMA value by applying the current price, the multiplier, and the previous EMA figure. This rolling process creates an average that adjusts efficiently as fresh market information becomes available.
For a simple worked example, assume a 10-period EMA has a previous EMA of 100 and the latest closing price is 104. The weighting multiplier is 2 divided by 11, which is 0.1818. The calculation becomes: (104 - 100) x 0. = 100.73 approximately. In practice, I find this kind of step-by-step calculation useful because it shows clearly how recent price changes influence the new EMA without discarding the prior trend completely.
Exponential Moving Average Formula
- Calculate the SMA: Period sum divided by N.
- Calculate the weighting multiplier: 2 divided by (time ).
- Calculate the EMA: (Closing price - previous EMA) x weighting multiplier + previous EMA.
In this formula, N represents the number of days or periods selected, while the period sum refers to the total of closing prices across that same interval. The calculation is straightforward in principle, but what matters in practice is how the result is interpreted within a broader trading strategy.
How to Use the EMA Indicator
When applying the EMA, many traders look for opportunities when price pulls back toward the EMA line in an upward market trend. In that situation, the indicator can act as a dynamic area of support and resistance. If the market is falling, some traders interpret rallies toward the EMA as possible resistance and use that information when evaluating whether to sell or reduce exposure.
From my perspective, this is where the EMA becomes practically useful. It can help a trader decide whether current price action is aligned with the dominant market trend or moving against it. In a contract for difference market, a foreign exchange market position, or a short-term commodity trade, that distinction matters because leverage amplifies both opportunity and risk.
The EMA is also useful for identifying support and resistance that evolve with price rather than remaining fixed at one level. When the EMA is rising, repeated pullbacks that hold near the line may suggest dynamic support, especially if price resumes upward movement after testing it. When the EMA is falling, failed rallies into the line may suggest dynamic resistance, particularly if sellers regain control soon after the test. In practical trading, I often look for confirmation through candlestick behaviour, volume where available, and the broader market trend before treating the EMA as a meaningful reaction level.
However, the indicator has limitations. It is built entirely on historical data, so it does not predict the future with certainty. It can also generate false signals, including misleading entries and exits, especially during periods of unstable volatility in finance or sideways movement. I often advise traders and investors to combine EMA readings with MACD, Stochastic, price structure, and broader information about the asset, including risk factors and, where appropriate, valuation in finance.
Another practical limitation is whipsaw risk in choppy markets, where price repeatedly crosses above and below the EMA without developing a sustained trend. The EMA can also lag during sharp reversals because, although it is more responsive than an SMA, it still reacts to events after they appear in price data. That is why I treat it as a lagging indicator that helps organize market information rather than predict the next move with certainty.
How to Set Up EMA
Setting up an EMA on a trading chart is usually straightforward. A trader selects the desired market, chooses the asset to analyze, and then applies the EMA from the platform’s technical analysis tools. The next decision is the time period, which should reflect the intended objective. A short-term trader may prefer a faster setting, while a longer-term investor may choose a broader average to reduce noise.
I have worked with market participants across Nigeria and West Africa who often underestimate the importance of matching indicator settings to strategy. A day trading approach in the foreign exchange market is not the same as a medium-term investment view on a stock or bond. The selected EMA period should therefore reflect the trade horizon, the expected volatility, the amount of money at risk, and the nature of the instrument being monitored.
Drawing tools can also improve interpretation. Trendlines, support and resistance zones, and projection techniques can all be used alongside the EMA. In practical terms, the indicator is most effective when it forms part of a disciplined framework rather than a single trigger for entry or exit.
How to Set Up EMA on MT4
For those using MetaTrader 4, the EMA can be added through the platform’s indicator menu. The process is familiar to many trader finance professionals because MT4 remains widely used for currency pair analysis, contract for difference trading, and broader technical analysis workflows. The platform also supports other tools such as MACD and Stochastic, which can complement EMA-based decision-making.
In my experience, platform choice matters less than analytical discipline. Whether one is reviewing a currency, stock, commodity, or cryptocurrency chart, the real value comes from consistent interpretation, sound calculation, and an understanding of how average-based indicators behave under changing market conditions.
Common EMA Periods and What They Mean
The 20 EMA, 50 EMA, and 200 EMA are simply exponential moving averages calculated over 20, 50, and 200 periods respectively. Those periods may refer to minutes, hours, days, or weeks depending on the chart being used. What changes is not the formula but the time horizon being measured.
In practical use, the 20 EMA is commonly associated with short-term trend analysis because it responds quickly to recent price movement. The 50 EMA is often used to assess the medium-term direction of the market and to filter out some of the noise that affects very fast settings. The 200 EMA is widely followed as a long-term trend benchmark, especially by investors and position traders who want to know whether the broader direction remains constructive or weak.
Traders also pay close attention to where price is trading relative to these averages. If price remains above a rising 20 EMA, that often suggests strong short-term momentum. If price is above the 50 EMA, it may indicate a healthier medium-term structure. When price is above the 200 EMA, many market participants interpret that as evidence of a broader bullish trend, while persistent trading below it is often seen as a sign of long-term weakness.
Which EMA Is Best for Trading?
In my experience, there is no single best EMA for every trader or every market. The most suitable setting depends on the trading style, timeframe, volatility of the asset class, and the purpose of the analysis. A period that works well for an active currency trader may be too sensitive for a long-term equity investor.
Common settings vary by objective. Day traders often prefer shorter EMAs such as 9, 10, or 20 because they want faster signals. Swing traders frequently use combinations such as 20 and 50 to capture medium-term moves. Longer-term investors often monitor the 50 EMA and 200 EMA to judge broader trend quality. I usually advise choosing an EMA setting only after considering the instrument, the pace of the market, and the amount of risk the strategy can tolerate.
The key point is alignment. A highly volatile cryptocurrency chart may require a different approach from a major currency pair or a large-cap stock. Best EMA settings are therefore not universal rules but strategic choices that should match the timeframe, market behaviour, and execution style.
What It Means When the 50 EMA Is Above the 200 EMA
When the 50 EMA is above the 200 EMA, many traders interpret that as a bullish signal because the medium-term trend is stronger than the longer-term average trend. It suggests that price has been gaining enough strength over recent periods to lift the faster average above the slower one.
This relationship is commonly associated with what traders call a Golden Cross, especially when the 50 EMA crosses upward through the 200 EMA after a weaker phase. In market practice, that signal is often viewed as confirmation that the broader trend direction may be turning upward or becoming more established.
Even so, I do not treat it as a guaranteed buy signal. It is more useful as a trend filter than as a standalone instruction. Traders may use it to favour long positions, reduce bearish exposure, or look for pullbacks that align with the new upward structure, but confirmation from price action and risk management remains essential.
EMA Crossover Strategies and Popular Combinations
EMA crossover strategies are based on the relationship between a shorter EMA and a longer EMA. When the shorter EMA crosses above the longer EMA, traders often read that as a potential bullish entry signal. When the shorter EMA crosses below the longer EMA, it is often interpreted as a bearish signal or an exit warning for long positions.
Popular combinations include the 9/21 EMA for short-term trading, the 20/50 EMA for swing trading, and the 50/200 EMA for broader trend analysis. The 9/21 combination tends to react quickly and can suit active traders. The 20/50 pairing often provides a balance between responsiveness and stability. The 50/200 combination is slower, but it is widely respected for identifying major trend shifts.
In practice, traders may enter when a bullish crossover occurs and price also confirms the move through structure or momentum. They may exit when the crossover reverses, when price breaks key support, or when the risk-reward profile changes. I usually caution that crossover systems can work well in trending markets but become unreliable in sideways conditions, where repeated false signals are common.
Summary
The EMA meaning in trading is best understood as a weighted moving average that responds more quickly to recent price changes than a simple average. That feature makes it valuable for tracking market trend direction, measuring momentum, and improving timing in a trading strategy. It can support analysis across a wide range of instruments, including stock markets, the foreign exchange market, a currency pair involving the Japanese yen, commodities, and cryptocurrency.
At the same time, the EMA is not infallible. Because it is based on past data, it cannot eliminate uncertainty, and false signals remain a real risk. I often advise that it should be used with other forms of technical analysis, broader market information, and sound risk controls before any investor commits money to a trade or investment decision. Used properly, it is a highly effective technical indicator, but its strength lies in disciplined application rather than mechanical reliance.